Configuration
In the previous section, we explored the execution of the Multipurpose Agent. This section will guide you through the process of configuring a new AI Agent within Vertesia Studio.
Agents
Utilizing interactions offers a straightforward and efficient method for creating specialized agents. We will revisit the example from the "Getting Started" section to configure an agent whose sole purpose is to generate lease agreements.
Prompt Creation
Before proceeding with interaction configuration, it is essential to create a prompt.
-
Navigate to the Prompts section in Vertesia Studio.
-
Create a new prompt and name it
Agent Lease Agreement. -
Configure the prompt parameters by copying and pasting the following JSON structure into the JSON editor:
{ "type": "object", "properties": { "agreements": { "type": "array", "items": { "type": "string" }, "editor": "textarea", "format": "textarea" }, "collectionName": { "type": "string" }, "documentType": { "type": "string" } }, "required": [ "agreements", "collectionName", "documentType" ] } -
Copy the following prompt content:
return ` Generate ${agreements.length} lease agreement documents for commercial office space, each tailored to different specifications: ${agreements.map((agreement,index) => `${index+1}. ${agreement}`).join('\n')} A lease agreement document must have the following metadata properties: - space size in square feet - term length - monthly cost - deposit amount - state - city - address - property manager If a document type named ${documentType} doesn’t already exit, create it with properties listed above Subsequently, these documents should be organized and stored within a collection named ${collectionName}". Create a collection only if doesn't already exists ` -
Finally, to validate the prompt configuration, copy the provided test data:
{
  "agreements": [
    "A basic, cost-effective option suitable for approximately eight workstations.",
    "A mid-range option accommodating approximately twenty workstations, three meeting rooms, and two individual phone booths.",
    "A premium option located on the fortieth floor or above in an office building, designed to accommodate approximately fifty workstations, ten meeting rooms, and ten individual phone booths."
  ],
  "collectionName": "Commercial Lease Agreements",
  "documentType": "CommercialLeaseAgreement"
}
Interaction Configuration
With the prompt successfully configured, we can now proceed to set up the interaction.
-
Go to the Interactions section in Vertesia Studio.
-
Create a new interaction and assign it the name
Lease Agreement Agent. -
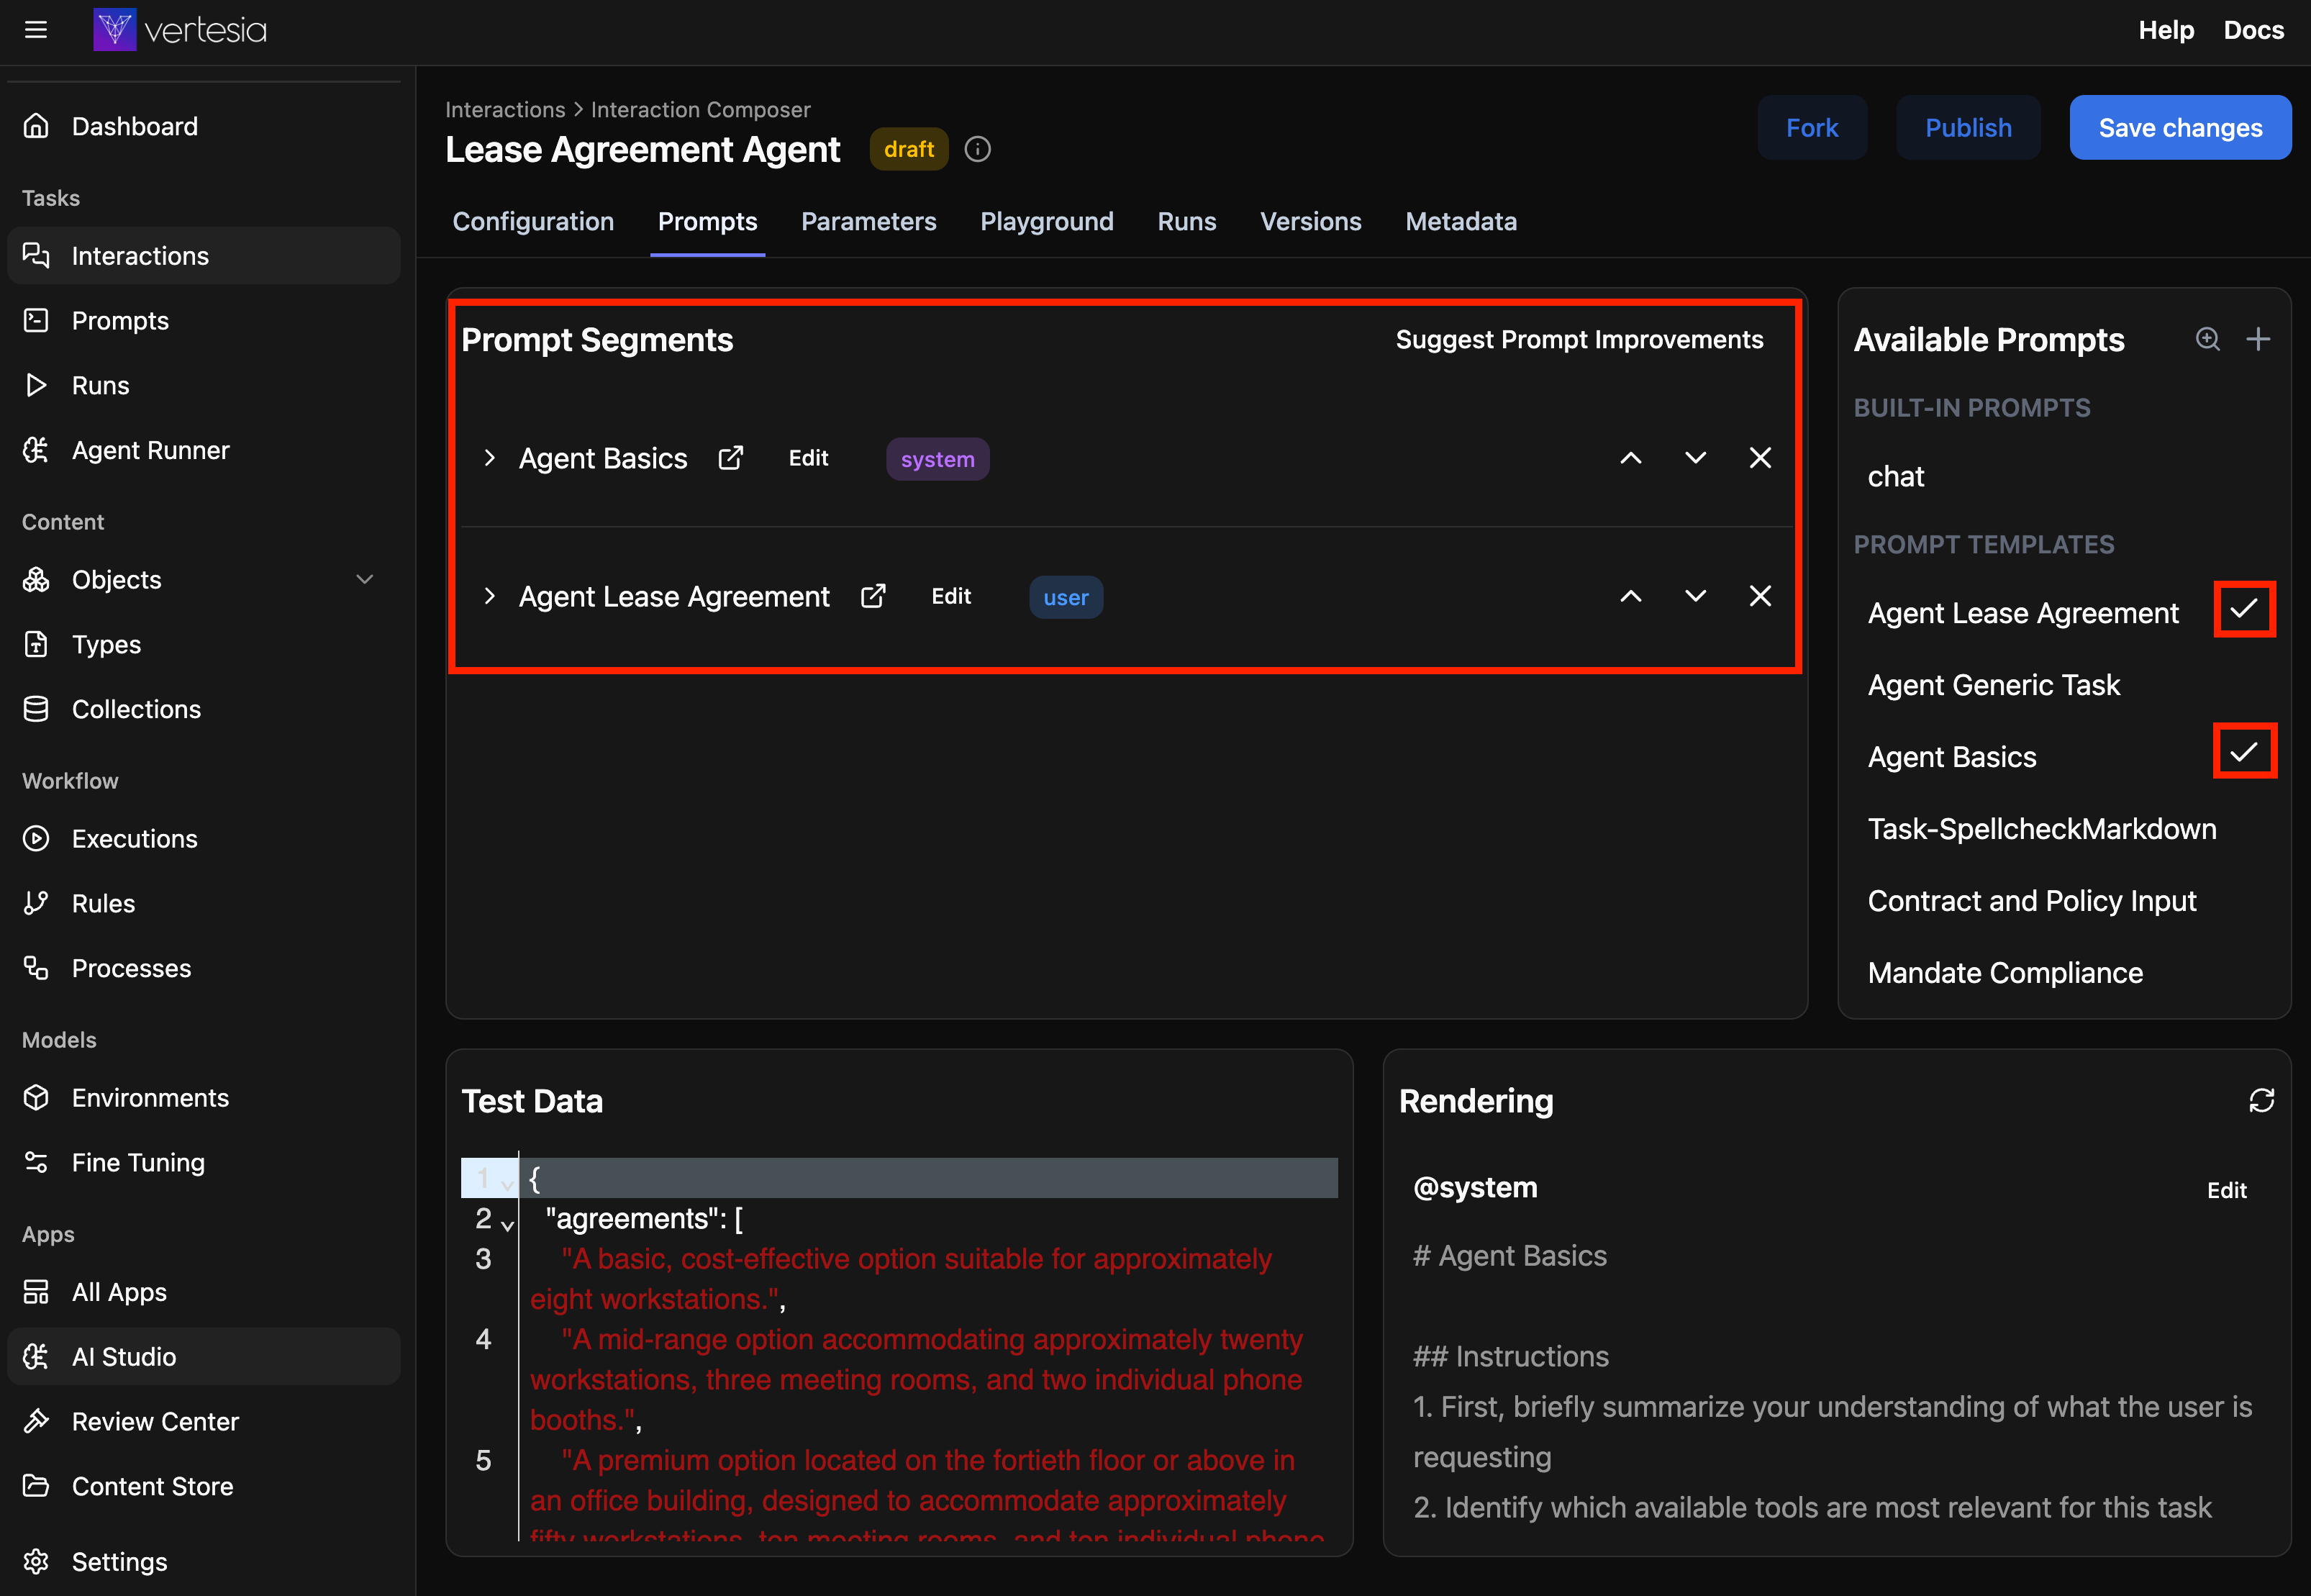
In the "Prompts" tab, you will add two distinct prompts. First, incorporate the pre-configured
Agent Basissystem prompt, which furnishes the agent with general operational guidelines. Subsequently, add theAgent Lease Agreementprompt that you configured earlier.
-
Navigate to the Agent Runner tab to configure the agent-specific settings:

In this tab, you can configure the following settings:
- Executable as Agent: Check this option to make the interaction available in the Agent Runner selection dialog. When enabled, this interaction will appear in the list of available agents.
- Available as Sub-agent (Tool): Check this option to make the interaction available as a tool that other agents can call during execution.
- Default Tools: Specify a list of default tools that this agent should have access to during execution. These tools can be builtin tools, custom tools, remote mcp server tools or other interactions tagged or configured as tools. Note that this setting can be overridden at execution time.
- Default Content Scope (Collection): Optionally select a collection to limit the agent's access to content within that specific collection. When set, the agent can only retrieve and search documents from the specified collection, providing better control over the data the agent can access. This setting can also be changed at execution time.
Enabling "Executable as Agent" is crucial for the interaction to become discoverable and available within the Agent Runner.
Agent Runner Execution
Finally, return to the Agent Runner via the left-hand navigation menu. You can now select the Agent Lease Agreement interaction, populate the necessary parameters, and execute your first specialized agent.

Further Exploration
This section has demonstrated how to configure and execute a specialized agent within Vertesia Studio. In the upcoming section, we will delve into initiating an agent using the Vertesia TypeScript SDK.
